Tuesday, February 27, 2018

How do I organize my ribbons ?


Hello there !

Some of you may know, I moved often from one country to another. I have a huge stash, and not always the same size of room to store it. During the years, I have tried different ways of storing for different materials. But today, I want to talk to you about my ribbons storage organization !

I have tried storing ribbons and laces spools on sticks, sorted on several drawers, or in clear boxes per colors... to finally have them on a big crate since my last moving several months ago...


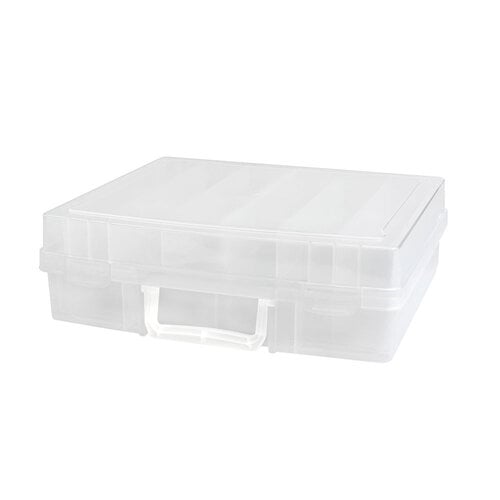
I finally found THE good way of storing them ! I found two big clear boxes with removable trays (washi tape storage box in fact) and started working on ribbon cards to organize everything...
I did mesure the inside of the compartimented tray and created the ribbon card out of white foamboard.


Here is the design and measurements I came up with :


As I wanted to know the brand of each ribbon or lace I own, I just write it on the side of the card.
And look at this stunningly organized collection of ribbons and laces !


I sort them by colors, and need two boxes. I have some room left and that's good, because I won't stop buying laces anytime soon...


I'm so proud of me ! I still have few huge rolls that doesn't fit anywhere, but almost all my collection is organized ! And it was about time, because I'm moving again in few weeks... As these clear boxes has a closing top, it's perfect for moving purpose... 


I hope this post will inspire you to get those ribbons organized ! Thank you for stopping by, I hope to see you very soon for another project !
Have a great day...

P.S. : here is the affiliate links to the washi storage box I used :


Friday, February 23, 2018

Do what you love - An art journal spread

Hello !

It was a day filled with inspiration today ! Finished 3 cards (cannot show you, they are for submissions...), started a mixed media project and created an art journal spread !


Long ago I applied what was left of inks I used on a stencil on blank pages, and forgot about it until today... The stencil was the Retro stencil, with Barbie and Juicy Colorations sprays.


I added a touch of yellow all over the pages with Sunshine Sorbet medium. Once dried, I played with decorative doilies stamps by Inkadinkado and Jet Black ink by Stazon. I variously colored them with gel pens.


I stamped the hearts (old Prima collection) on white cardstock and painted them with different colors : Tango Velvet, Rhodolite Gemstones, and Dragon Fruit. The sentiment is a die cut , outlined with black and white pen.


I created this spread also to participate in the More Than Words challenge, who requiered to use heart shape and the word Forever. The word can be found in the second part of my sentiment : life won't last FOREVER !


Thank you for stopping by today ! I hope you liked this journal spread ! Wish me luck for the challenge...

Have agreat week end, see you soon for next post about ribbons organization...

Thursday, February 22, 2018

ATC with Art Anthology

Hi there !

I'm on the Art Anthology blog today with a new bright project : ATCs !


ATC are little pieces of art, same format than games trading cards, 2 1/2" x 3 1/2". So I started with white cardstock painted with Colorations sprays in GloriousTimeless and Juicy for the background. Then I applied Coral Sorbet with the Lotus stencil.


I created two more layers with the Fragments stencil and pink distress oxide ink, and the Take flight stencil and a black pen. I also cut the ATC from this background and distress the edges with black sooth ink.


I cut white paper with a globe die and sprayed it Raider Colorations spray all over it and cut it in half before gluying it to the ATC.
Quote came from a Ranger Dylusions stamp on white cardstock cover with Sunshine Sorbet and Glorious Colorations spray 

You can watch the whole process in my new tutorial video :


Thank for your time ! I wish you a great day and hope to see you soon...

Wednesday, February 14, 2018

It's a great day to be a mermaid !

Hello people !

I recently indulge myself with few new stamps and I wanted to use immediately the mermaid one...


I ended up by making a card in teal, using my Copic Sketch markers for coloring the mermaid, the mermaid word, and some of the scales. Papers are from the Coastal stack by DCWV. 


When I was done with coloring, I knew I had to add shells and sand dollars to the card. I went to the craft store and of course saw the beautiful sea shells, starfishs and other real sea items. But I did not buy them. The reason is that seashores are devastated by people harvesting enormous quantity of these cute items. They are not  empty shells from the beach but very much alive animals collected to be dried up and sold in stores. It is devastating for the ocean. So please, if you want cute embellishments for your pages, cards or DIYs, please do not buy those.

What I did instead was buying a seashells mould that I could use over and over again. I create these embellishments with air dry clay and Art Anthology paints : Sunshine, Portobello and Cayman.


A washi tape and rub-on letter for the sentiment with the stamped word et voilĂ  !

Thank you for stopping by today, I hope you liked what you saw.
See you very soon for another project !
Have a wonderful day...

Monday, February 12, 2018

Birthday card for the Save the crafty YouTuber video hop

Hi there !

It's a special post today. I have a card and a video tutorial, but tht's not all of it...


If you're not a YouTuber, you may not know it, but YouTube has changed the rules for earning money with videos. Do you think you're not concerned because you are only watching videos ? You're maybe wrong. Many of the crafty YouTubers would not meet the new requirements and will not be able to earn money for their hours of works from shooting while crafting, editing and sharing videos on social medias. If they don't earn money, they will not have cash to spend on new crafty things, or time to spend on new videos... So for you, it will be less to watch. Only channels with 1K followers and 4K of watched hours will monetize their videos. You will be left with few still capable to spend time and money on this...

So Justine Hovey came up with an idea... She gathered a whole bunch of sponsors AND Youtubers to create the "Save the crafty YouTuber video hop" !


This video hop is so huge we have 120 prizes to give ! Look at all the sponsor we've got !


In every videos you will have the chances to win ink pads from Catherine Cooler !


How do this work ? Super easy. You can start by watching my video on YouTube, left a comment (please add USA or International in it), and then go to the next video (you will find the link in the video description) ! The more you watch and comment, the more chances you will have to win ! There will be two prizes by video and random prizes too !

How incredible is that ? Support crafty YouTubers and try to win some goodies ! Go watch my video there (don't forget to subscrire to my channel, that would encourage me too...) :


Thank you for time, have fun with this giveaway. I hope to see you soon, both on my blog and my YouTube channel !

Thursday, February 8, 2018

Rusty leaves scrapbooking layout

Hello !

Back to scrapbooking today with a new layout for the Art Anthology blog !


This picture was taken in one of my favorite place, the forest behind my mountain house in France, with two of my favorite beings, my daughter and my dog ! 
To mimic the look of the leaves, I used the Rust Texture set to create the rusty leaves.


I didn't have enough leaves for this layout, so I just drawn some more using the metal ones as template, and painted them with the same rust set...


I also use the grunge diamond stencil with Leaf Sorbet dimensional medium for the background.


Papers came from the Treasures stack by DCWV. I added some stamps like the Bricks stamp by Prima or the water droplets by Deep Red. And some distress inks in Mahogany and Walnut stain for the edges.

I made a video tutorial if you want to learn how I create the leaves (and the whole layout) :


Thank you for stopping by today ! If you didn't use alredy rust paints, give it a try, it's really fun.
See you soon for another project !

Tuesday, February 6, 2018

Queen of heart : an altered mask

Hello !

It's February, and it's all about heart and pink, but there's more to see on my new project...


The post is called Queen of heart, but in fact it's more Queen of broken heart. She's crying and her face is crackled, but she still have her crown. Maybe she crying over her broken heart, maybe over the heart(s) she will brake...

The base is a paper mache mask, first covered with white gesso then with a lot of embellishments... We have flowers, clay made with moulds ( like this one), buttons, pearls, chipboards, wood heartsart stones... Everything was glued, covered with gesso, and then I applied platinum crackle paste all over.


Like every beauty, she did need a good night of sleep before applying color... I choose the Indulgence Minx that I applied with a small brush.


How do you like this mask ? Each one I made is pretty special. I offered one in black and copper to my mother, as she likes Venice so much. Turquoise and gold was joyful to make. The New Orleans style is still in my living room.
I wonder if I should sell them, or if I should propose workshop to re-create them ? What would you choose ?

Thank you for your time, I hope to see you very soon for my next project, where I used a rust set on a layout... See ya !

Here are some affiliate links to some products I used :


Thursday, February 1, 2018

New Year card in (Tim Holtz) style

Hi there !

We are now in February, New Year greetings are officially overdue, but let me show you a card I have just sent to a friend as New Year's card :


It's not a traditional one, no wishes, because I think in life you can obtain what you want by doing something about it, not waiting for a wish to come true. So this year, do what you need to have the life you want. And that includes me... I don't have New Year's resolutions but goals to be pursue over time.

So, about this card... Papers are from the Boutique Vintage paper pad by DCWV, and stamps are from Life's Possibilities set by Tim Holtz, with Walnut stain distress ink.

Speking of Tim Holtz, did you know that they are now 7 free classes available on Scrapbook.com from him ? You can register and watch the videos over and over again at no cost ! I am registred ? Are you yet ?

click here to access the classes !
Have fun watching these videos, I will now go finish my next mixed media project (something with rust, you will see...).
Thank you for stopping by, and have a great day !