Friday, November 30, 2018

Have a Holly Jolly Christmas card

Hello !

Another card with a die, still cut from the North Pole Gazette paper pad (Recollections) :


The card base is a 10"x 7" silver and black rectangle fold in half. The tag matted with red is a journaling tag from the pad. I cut out 4 snowflakes that I placed on 3D adhesive foam on its corners.
I found this die by Spellbinders lovely, this Christmas phrase in shape of a tree is really cute.

Let me remind you about my giveaway : 30 days, 30 cards before Christmas. Comment at least on one of them to enter the giveaway. The more cards you comment, the chance you have to win. Being a follower is not mandatory but really appreciated. Look at this post for details and prize.

Have a wonderful day and see you tomorrow...

Thursday, November 29, 2018

Advent calendar made with Cricut

Hello !

In Europe, we have this cute tradition called Advent calendar. I know in the States you have the 12 days before Christmas, but this is different. This calendar start on December 1st and stop at Christmas. You have an opening window for each day, with a surprise inside. The most common ones are filled with chocolates, but we can see more and more of brands making their own, a lot with beauty products. I have two daughters, and one love the beauty surprises, the other one doesn't care, preferring kawaii (cute japanese) surprises and food.
Well I decided (again) to create one for each girl, and I did it with the help of my Cricut and the Tags, bags and boxes cartridge.


I cut a box <purse2-h> for each day, with different sizes from 7" to 4", using the "A Winter's Night" paper pad by Recollections. I had it for $5 on sale and made two calendars with only half of the pad !


One of the design sheet was ornaments with number : it was perfect for my calendars as the pad has two of this sheet ! So I cut each number/ornament, and made a small hole to attach it to the bag.


Each bag has a string (different lengths), and I arrange them by number, with the 1 on the front, so the girls can pick one bag without disturbing the others.

By the way, the Black Friday deals are still available on the Cricut website, and until the Nov, 30th there is a coupon code for free shipping : FREESHIP49 (for $49 order and up). You could have a big box under the tree in time for Christmas...

My Cricut is always very helpful to create personalized gift. Take a look at the Advent Calendar I made in 2016.

Thank you for stopping by today. See you soon for another project...

A red crown for Christmas

Hi !

Finally a die has been used on my cards ! It's a die called Countesses Crow (Crafter's Companion), normally used as an edge, but I made it my center element :


The card is cream, cut from the center of a sheet with design on two corners (the one with pine tree and deer from the North Pole Gazette by Recollections). The red part is one piece only : I cut a 4 1/4" x 5 1/2" rectangle and then run it twice with the die (once reverse) to have this design. I cut the tag from another sheet and use a left over from black paper to cut the small ribbon with decorative scissors.

We are now at day 5, I hope you like my cards so far. Don't forget to comment if you want to enter my Christmas giveaway.

I will have another post later today about the Advent Calendar I made for my daughters (yes, 2) if you want to take a look...

Have a great day, and see you later...

Wednesday, November 28, 2018

Square Christmas card

Hi there !

Kraft and black again for this new Christmas card, but with silver this time !


I use the sketch of a card I made for Fall sometimes ago, with a different sizing. This is a 6x6 card with 6 different papers on it !

This is the 4th card out of 30. If you haven't done it already, comment on at least one of the 2018 cards to enter my giveaway and maybe win something extra for Christmas ! See this post for details...

Have a very nice day and see you tomorrow...

Tuesday, November 27, 2018

Plaid Merry Christmas card

Hello !

Something a little more traditional for this third card, with plaid, reindeer and pine tree !


Still no die or decorative scissors in this one, only my craft knife and glue. I just outlined the kraft border with a black pen to make it pop from the background. Base still is a 5 1/2" x 8 1/2" fold in half.

If you just arrived on this blog, there is a giveaway going on until the 24th of December. See this post for details. Don't forget to comment on one or more cards to enter it !

Have a wonderful day and see you tomorrow...

Monday, November 26, 2018

Believe Christmas card

Hello again !

Day two of my 30 cards before Christmas giveaway ! If you're just jumping on this, see yesterday's post for rules and prize...
Black is kind of the new green for Christmas in the paper pad I use, you're gonna see a lot of it in my cards...


 I couldn't resist to cut the cute believe banner to make it my sentiment. The red snowflake was a countdown tag and the small banner covered perfectly the number.
The base of the card is a 5 1/2" x 8 1/2" rectangle fold in half. I just layered few other papers under the snowflakes.

Don't forget to comment if you want to enter my giveaway. If you are looking for inspiration, take a look at my Christmas projects from the past years (see the tags on the top of the blog). There is no two alike project !

Thank you for stopping by today, hope to see you tomorrow too !

Sunday, November 25, 2018

30 cards before Christmas giveaway is back !

Hello everyone !

I hop you had a great Thanksgiving and you now are ready for Christmas ! That's right ! We are only 30 days away from Christmas, and that means I will start to show all the 30 cards I made this year...

If you are new to this blog, know that it's been several years now that I run a little giveaway during this month, where I show a card each day and you show me some love by commenting on them. And on Christmas day I will pick a winner for my giveaway ! Basically, the more comments you made, the more chance you have to win...

Every year is slightly different, so for 2018 I decided to use only ONE paper pad to create these 30 cards (no blank card!) ! The only tools I used were scissors of all kinds and dies, all already in my stash. I think everybody will agree that we prefer to keep our money for gifts than for cards... So I even go deeper in saving by using a paper pad I bought for $5 ! It's not a cheap one, good acid free cardstock with treatments and all... It's one of the Recollections Christmas paper pad you can find on super sale like always. This one is called North Pole Gazette. I even had enough papers to create more than 30 cards (maybe I will show more than one on some days...).

Well, let's start with the card, and I will show you what you could win on Christmas day after...


This first card is super simple, in unusual colors for Christmas but elegant. The paper is full of patterned papers, no plain color, and it's not always easy to create with this amount of patterns ! But you will see that I managed to mix them without difficult (or maybe just a little sometimes..).

The base is a sheet cut into a 5 1/2" x 8 1/2" rectangle, folded in half. Two smaller rectangles, and two elements cut from another sheet, plus the deer square (was a countdown square, but I mask the number with the tag). I adhere everything with adhesive sheet. By the way, did you know that a 6x6 double sided adhesive sheet package of 5 is today's freebie at scrapbook.com, as well as a pack of 3 clear stackable daubers. Use the coupon code HOLIDAY2018 to receive $10 off any $70 order on top of exclusive sales up to 50% off. But hurry, today is the last day of this Scrapbook.com offer !

Ok now the prize part. No paper this year, but something to cut yours... By commenting at least once on one card's post between today and the 24th of December, you will earn one entry in the drawing for this prize :


The winner will receive one Cuttlebug Spring floral die, two Sizzix phrase dies (let's party and my best friend!) and one Stamp& Emboss set by Sizzix/Hero Arts (A2 cling rubber stamp and a matching embossing folder).

Thank you for stopping by today. I hope to see you everyday from now, remember, each comment on each card will earn you a giveaway entry !

Have a fantastic day !

Tuesday, November 20, 2018

Create your Art Journal pages with stencils and stamps

Hello there !

I'm on the Art Anthology blog today with a new mixed media project :


I started by spraying Timeless and Warm Colorations over the pages, stamp designs all around and add more colors with Poppy, Chocolate, Kenyan Copper and Leaf Sorbets. I also added a little of Gold Metal Effect to it.


The stencils I used with the paints were Bits of Grunge and Blocked stencils by Art Anthology too.
For my journaling I decided to use an acrylic journaling tag I added since forever in my stash, just panted nto in green and gold and write with a black Sharpie on it.


I made a complete video tutorial for you if you want to know more about this process :


Thank you for stopping by today, I will see you soon with another project...
Have a great day !

Friday, November 9, 2018

Build your background for a Fall layout

Hi everyone !

It was about time to create a scrapbooking layout ! If you had visited my blog in the past, you may have seen a page with a similar picture... Well, I love my daughter, my dog, and these French woods, so I used a picture taken the same days than the other layout to create a layout for the Art Anthology blog :


For this one, I create the background using Art Anthology Colorations sprays to color the stamps, splash some colors on the paper and splatter inks all over.


You may recognize the scripture stamp by Bo Bunny , flower bouquet by Stampendous and flowers stamps by Inkadinkado (very old one). 


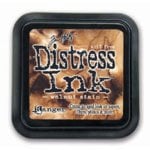
I used various papers from the Ledger pad by Prima, Corrugate Neutral yellow paper and green cardstock by DCWV, Walnut stain distress ink, Petaloo wild roses, Prima flowers, Um Wow chipboard and Doodlebug pearls.

You can watch me create this layout on my new video tutorial here or on my YouTube channel :


Thank you for your time, have a wonderful day and see you soon for another project !


P.S. : here are some affiliate links of products I used :