Thursday, March 23, 2017

March Make It Prima challenge

Hi there !

It was not possible for me to let the Prima March Make It challenge without creating something !
So I said to my back to be strong while I was making this tag, with rich chocolate cream and pastel pink colors, layers and fun !

shabby chic Prima Marketing tag with dies, flowers, embossing and chalk

As required, my tag is filled with Prima products... Flowers, of course, but also dies (for the leaves and doilie), papers (Ledgers for the mint and the chocolate, Tales of you&me for the flowers and butterflies), the tag (aquarelle tag pad), the ribbon (old collection), stickers (Tales of you&me), chalks in old rose and teak wall, and the fabric butterfly !

close-up shabby chic tag with Prima Marketing flowers, dies, papers, embossing and fussy cutting

Only two things are not Prima : the Sizzix embossing folder I use on the pink tag, and the clay heart. The dies and embossing folder used in this project can be used with the Sizzix Big Shot Machine  

shabby chic tag with Prima Marketing products

I missed the different challenges from Prima... Having three challenge increased my chances to win... Besides, I always loved using their sketch for layout and card...
But hey ! I'm not giving up on winning one day ! After all I've been featured several time, including last month...

Thank you for stopping by today, I hope you liked my new tag...
See you soon (probably next week now because my back makes me pay this work...) !

Wednesday, March 22, 2017

Flowery Hello card with La Compagnie des Elfes


Bonjour !
 
I have a "Hi" card for you today, made with stamps from La Compagnie des Elfes and papers from DCWV :

CAS card with flower stamp and DCWV papers

I started by stamping the flowers and the leaves on the card base, using the masking technique to make clusters. Then I cut three panels from the Minty Lace stack by DCWV. I adhered first the black one.
I stamped on white cardstock the flowers and leaves, fussy cut them, before adhering few in clusters over the edges of the black paper. I repeated this step with the wood paper, and at the end, I adhered the journaling card.

So Hello to you and have a great day ! Stay connected with friends and relatives and... make cards.
Bye !

Tuesday, March 21, 2017

Shabby chic altered box with Art Anthology

Hello !

It took me forever (due to my back issue), but I was in time for my Art Anthology's post !
This time I created an altered box, with shabby chic style using mixed media techniques... Take a look :

shabby chich mixed media wood box with Art Anthology paints and Prima Marketing flowers

To add Spring colors to this box, I used the Colorations sprays by Art Anthology in Avocado and Wild Orchid.
For the embellishments, I used Prima Marketing flowers and dies, lace, half-pearls, metal embellishments, and Martha Stewart molds with air dry clay for the corners, central frame and cameo.

You can see additional close-up pictures and the complete video tutorial on the Art Anthology's blog.
For more mixed media tutorial, you can go to my YouTube channel too...

Thank you for stopping by today. Hope to see you soon for another project...

Thursday, March 16, 2017

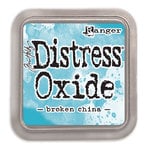
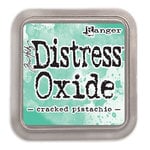
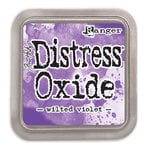
Did you try the new Distress Oxide inks ?

Hello...

I had a LOT of free time laying down in my bed after back surgery, and while looking at thousand of pages on the internet, my fingers must have hit an "order now" button by mistake and someone delivers the 12 new Tim Holtz distress oxide inks by Ranger to my home today ! What can I do ? These babies were in need of a new home and I will not be the one to send them back to a cold box somewhere in a dark warehouse !

So I took them out the package and gave them a place to stay in my scraproom... Better, I tried them ! And I made a card with a video tutorial for you (find the link at the end of this post) !

distress oxide ink tutorial to create a card with stamps


Take a closer look at the oxide effect :

effect using distress oxide ink by Tim Holtz and Ranger

One thing surprised me : the texture of these inks... they looks like chalks ! But they really react differently with water...

effect using distress oxide ink by Tim Holtz and Ranger

Besides the oxide, I used stamps by Inkadinkado, Heidi Swapp and Prima Marketing, black Stazon ink, and DCWV cardstock with Square Glue Dots to adhere the different panels.


Take a look at my video tutorial to learn how I created this card :


Thank you for stopping by today. I'm getting slowly back to crafting so please be patient and come back soon for my next project...

Thursday, March 9, 2017

DCWV March challenge card

Hello !

Here is my second project for the DCWV March challenge, a card created with the Boho style stack :

Gypsy orange and turquoise card with DCWV papers

Borders, flower, feathers and tag are fussy cut. Turquoise ribbon by May Art Ribbons. Sentiment Stamp by Maya Road.

Here is the sketch from the DCWV Facebook page :

Aucun texte alternatif disponible.
Have fun with it. I will now rest a bit, my back has said to me "too much standing in front of your computer !". I will hopefully be able to scrap again next week.
Thanks for stopping by and see you soon !

Wednesday, March 8, 2017

DCWV March sketch layout

Hi everyone !

Each new month comes with two sketches from the DCWV challenge : one for a layout and one for a card. This month you can find the challenge on their Facebook page !
Today I will show you what I have done with the layout sketch !

Shabby / vintage country scrapbooking layout with DCWV papers

I choose to use the Country Floral stack to create a vintage look on this page, to go with the style of one of my favorite 's picture, taken when my daughter was 18 months old...
I create the title with the Graphically Speaking cartridge by Cricut.
I glue around a 7" circle a white lace easily with Fabri-Tac , and add alpha stickers by Sticko to the small frame punched with a McGill punch.
Everything else came only from the Country Floral paper stack by DCWV.


shabby vintage country scrapbooking layout close-up on fussy cut roses

Did you really imagine I will not cut out these beautiful roses ?... Or this ampersand ?


shabby vintage country scrapbooking layout close-up with DCWV papers


Here is the sketch I use from the DCWV Facebook page :

Aucun texte alternatif disponible.

Have fun playing with it !
Thank you for your time and see you tomorrow to present you my card for this challenge...

Tuesday, March 7, 2017

Japanese style bookmarks with Art Anthology


Hello everyone !
 
It's time for a new tutorial on the Art Anthology blog ! My project was inspired by some recent buying, but you will have to look at the blog's post to know more...

Japanese style bookmarks with Art Anthology paints, stamps and mixed media techniques

I did use, of course, Art Anthology products : Juicy, Timeless and Barbie Colorations sprays, Coral Sorbet Dimensional paint, Retro and Blocked stencil.
The base is a Ken Oliver bookmark, and stamps came from the Asian Umbrella set by Stampendous.

You will find more pictures and the video tutorial on the Art Anthology's blog, as well as on my YouTube channel.

Thank you for stopping by today. See you tomorrow for a scrapbooking layout to showcase !

Friday, March 3, 2017

Published card with Prima Marketing

Hello folks !

Some of you may know that I had back surgery few days ago. I will not be able to play with my scrap goodies during a while, as I cannot sit at all, or stay stand for long. But it doesn't mean I can't share my projects with you ! I may have few in my pocket I've waited to show you because they were published and not available for posting...

Let's start with a cute card published in the June 2016 issue of Craft Stamper...
The theme was French Fancy, so I'd popped up my En Francais 6x6 paper pad and the Julie Nutting Merci stamps set by Prima Marketing.

Prima Marketing card with Julie Nutting doll stamp

You can see my own French Touch here by the cut out flowers and leaves from one of the papers... The dress was stamp in the flowery paper too and cut to dress up the doll.
Copic markers to color the doll and highlight the flowers, laces and ribbon on the left of the card, plus Walnut stain distress ink by Ranger and I was done...

As I said, I have few projects to show you before getting back to crafting, so please be patient and come back soon...
Thank for stopping by today !